
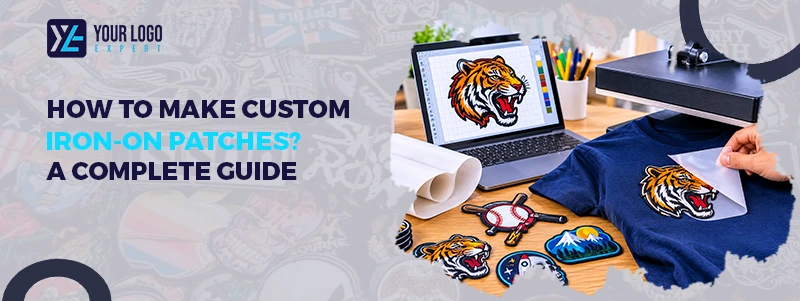
How to Make Custom Iron-On Patches? A Complete Guide
Want to add a personal touch to your jackets, jeans, bags, or uniforms? Custom iron-on patches make it easy. You can create your own designs and attach them to fabric without sewing.
Whether you want patches for personal use, a clothing brand, or business promotion, the process is simple. You just need the right materials, a good design, and proper heat. This guide explains how to make custom iron-on patches, which materials to use, and how to attach them correctly.
What Are Custom Iron-On Patches?
Custom iron-on patches are fabric designs with a heat-activated adhesive backing. You can attach them to clothing and other fabric items using a household iron or heat press.
These patches come in different shapes, sizes, colors, and styles. You can add logos, names, artwork, or text to match your needs.
They are popular for denim jackets, uniforms, backpacks, hats, and promotional clothing. They also offer a simple way to cover small holes or marks on fabric. If you want clean, professional embroidery files for your custom patches, consider our Custom Digitizing Service.
Get Your Artwork Ready!
What Materials Do You Need to Make Iron-On Patches?
Before starting, collect the right materials. Each item plays a role in making a clean and long-lasting patch.
- Fabric: Twill, felt, and other suitable fabrics can be used as the patch base. Your choice depends on the design and finish you want.
- Embroidery Thread: Use quality thread to create colorful designs and clear details.
- Heat-Activated Adhesive: This material helps the patch stick to fabric when heat is applied.
- Embroidery Machine: An embroidery machine is useful for stitching logos, letters, and artwork onto the patch base.
- Scissors: Use sharp scissors to cut the patch into your chosen shape.
- Iron or Heat Press: You need heat to activate the adhesive and attach the patch to clothing.
- Teflon Sheet or Pressing Cloth: This protects the patch and garment during the heat application process.
How to Make Custom Iron-On Patches Step by Step
Making custom iron-on patches takes a few steps. Follow this process to get a neat finish. If you want sharp, scalable artwork for your patch designs, consider our Vector Conversion Service.
Step 01: Create Your Patch Design
Start by deciding what your patch should look like. You can use a logo, name, symbol, or custom artwork. Keep the design clear and easy to read. Very small details may not stitch well, so avoid thin lines and tiny text. Choose colors that match the fabric and purpose of your patch. Also, decide on the patch size before moving to production.
Step 02: Prepare the Artwork
Your artwork needs to be ready for embroidery. A regular image file cannot always go directly into an embroidery machine. The design must be converted into a stitch file through embroidery digitizing. This process sets the stitch types, directions, density, and order. A well-prepared file helps create clean edges and better details. If you do not have digitizing skills, consider a professional custom digitizing service.
Step 03: Choose the Patch Fabric
Select a fabric that supports your design and intended use. Twill is a common choice for embroidered patches because it offers a smooth surface for stitching. Felt can also work for certain patch styles. However, the best option depends on the design, embroidery details, and final application. Make sure the fabric can handle the heat needed for the adhesive.
Step 04: Embroider the Design
Load your prepared fabric into the embroidery machine. Select the correct stitch file and thread colors. Run a test if the design is new. This helps you check the stitch quality and make changes before final production. Once the design looks right, embroider the patch. Keep the fabric stable during stitching to avoid uneven results.
Step 05: Cut the Patch Shape
After embroidery, remove the extra fabric around the design. Use sharp scissors or suitable cutting equipment to create clean edges. You can make round, square, rectangular, or custom-shaped patches. Keep the border even so the patch looks neat. Some patches also use a merrowed border, while others have a clean laser-cut edge.
Step 06: Add the Iron-On Adhesive
Place the patch with its back facing up. Cut the heat-activated adhesive to match the patch size. Follow the adhesive manufacturer’s instructions for application. Different adhesive products may need different heat settings and pressing times. Make sure the adhesive covers the back evenly. This helps the patch attach properly to the garment.
Step 07: Attach the Patch to Clothing
Place your patch on the garment where you want it. Set your iron or heat press according to the adhesive instructions. Cover the patch with a pressing cloth or suitable protective sheet. Apply even pressure for the recommended time. Let the patch cool as directed before checking the bond. Avoid moving it while the adhesive sets.
How to Apply Iron-On Patches Correctly
Correct application helps your patch stay in place. Start by checking the garment’s care label to make sure it can handle heat. Place the garment on a flat surface. Remove wrinkles from the area where you plan to attach the patch. If you want vibrant, ready-to-press designs for clothing and fabric, consider our DTF Transfers Service.
Position the patch carefully before pressing. Once the adhesive touches the fabric, moving the patch can affect its placement. Use the recommended temperature, pressure, and pressing time. Do not guess these settings because different adhesives and fabrics need different conditions.
How to Make Iron-On Patches Last Longer
Proper care helps protect your custom patches. Always follow the garment and adhesive care instructions. Turn patched clothing inside out before washing. Use a gentle wash cycle and avoid harsh cleaning products.
Do not use high heat in the dryer unless the patch and garment instructions allow it. If an edge starts lifting, follow the adhesive manufacturer’s repair instructions. For items that face regular washing or heavy use, sewing around the patch can provide extra support..
Conclusion
Making custom iron-on patches requires the right artwork, fabric, stitching, and adhesive. Each step affects the final quality. At Your Logo Experts, we help businesses create quality custom patches with clean designs and professional finishing. Whether you need embroidered patches, custom digitizing, or vector artwork, our team is ready to help. Get quality service, fast turnaround, and support for your next patch project. Contact Your Logo Experts today and get a free quote.
Our Services
Get Started
Frequently Asked Questions
They are commonly made from embroidered fabric with a heat-activated adhesive backing.
Yes. You can make them with fabric, embroidery supplies, adhesive, and an iron or heat press.
Twill is a popular choice because it provides a smooth base for embroidery.
Yes. A household iron can work if the adhesive instructions allow it.
Follow the adhesive manufacturer's recommended pressing time and temperature.
No. However, sewing around the edges can provide extra hold.
Yes, if the adhesive and garment allow machine washing. Follow their care instructions.
Some polyester fabrics can support iron-on patches, but always check heat limits first.
Poor adhesive, incorrect heat, low pressure, or unsuitable fabric can cause peeling.
Iron-on patches are easier to apply, while sew-on patches often provide stronger attachment for heavy-use clothing.
Useful Links
Company Info
- +1 (816) 465-9624
- info@yourlogoexpert.com
- 2501 Chatham Rd STE 4504, Springfield, IL, United States, 62704
Copyright © 2026 Your Logo Expert. All Rights Reserved.
